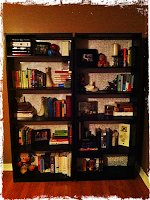
I recently saw an article in an interior design magazine that talked about re-vamping items already found in your home to be great room accent pieces instead of purchasing new ones. This made a lot of sense to me since because, let’s just face it I’m cheap when it comes to spending money, and we just bought our first house and I was eager to get decorating! (I’m a major nester incase you didn’t know!) Our new house has a great corner that I wanted to use a book nook for our 9 boxes of books. (Yes that’s right I said 9 boxes of books, second only to my 11 boxes of shoes.) I decided to put our two cheap-o Walmart black bookcases in the brown painted corner which made the corner look entirely to dark. I had seen recovered book shelves before where people replaced the back boards with a covering of wall paper or a stenciled paint job and was eager to try it. Even though the article suggested wall paper or paint, I figured the same concept would work with wrapping paper…and I was right! I made a trip to Hobby Lobby and bought a roll of white wrapping paper with stenciled gold designs on it. (Note: You can use wrapping paper, wall paper, paint, lace, fabric, etc. Your choice really.)
To start off, all the shelves (if possible) need to be removed. There are many ways to repaper the back of most bookshelves, but I found if the backing cannot be removed to be recovered the easiest thing to do is take exact measurements of the inside shelf area(s) and cut the paper to an exact fit. Since I never can seem to do things the easy way this is not how I did mine. I decided to line up two of the already straight edges of my paper with the corner and two edges of the shelf, and using double sided tape, I stuck down each corner. Then I began smoothing out the paper to the backing until I reached the opposite corner where I had already applied my double sided tape. I then pushed the paper into the crease of the shelf to make a good fold line to cut along with my razor blade. (Make sure to get the razor or knife into the crease to cut along the fold it will help keep the straightest edge possible.) Once the excess paper is shaved away make sure there are no bumps or edges pealing back from the backing and you are ready to put your shelves back in place. (Note: You can also use glue or Modge Podge instead of double sided tape to hold the paper onto the backing. Tape is the easiest for removal if you ever decide to replace or remove the paper when redecorating, which I like to do a lot!) And it is a simple as that! Measure, cut, glue/tape, and reshelf and you’re done! All for the cost of one roll of wrapping paper and a bottle of glue or tape I might add. It is cheap styling made easy!


No Comments Yet, Leave Yours!