Showing posts with label Pinterest Projects. Show all posts

Homemade Laundry Detergent

Monday, August 12, 2013

I’m not an overly obsessed pinner on Pinterest, but I am a major DIY’er. If I can do it myself, I prefer to.  So when I saw the dozens hundreds of DIY laundry soaps and baby wipes being pinned, I was intrigued.  At first I thought it would be more of a hassle than it would be worth, until I found a mom blogger who had put them both to the test to see her savings over the course of a year.  By replacing these two items with homemade versions she claimed to have saved $600 a year! Now granted she has 6 children in a household of 8, and we are only a family of three, but still I wanted to give it a shot.
I mean $600 is one mortgage payment.
$600 is one large vacation, or three mini weekend get-aways.
$600 is eight weeks of groceries in our house.
$600 is 15 tanks of gas in my car.
$600 is one year of paid satellite television.
Even if in our small household we only save a portion of that, we would still see the savings over time. So ten minutes of mixing time seemed well worth it. We decided to only do the laundry detergent for now, as we are almost done (fingers crossed) with baby wipes for now.  When we have more children we will try to do both.
I thought I would share my recipe even though it is not the most original I’m sure. I saw many recipes on Pinterest that I liked and decided to mix several different ones for my own.

A few reasons for my choice ingredients:


  • *We used Zote soap instead of Fels-Naptha for two reasons.  Zote is plant derived so it’s environmentally safe, whereas Fels-Naptha is not and is strongly discouraged if you have a septic take (even though we do not) because it kills the good bacteria inside them causing back-ups over time. Fels-Naptha is also harmful if it gets in your eyes or ingested by mouth whereas Zote soap is not. Because of this we went with the Zote soap which has a whitening agent in it but does not have as much stain/grease fighter in it. For that reason we added the Oxi-Clean which replaced the need for Fels-Naptha. If we had not used the Oxi-Clean we would have used a small amount of Fels-Naptha instead, but in smaller amounts mixed with the Zote soap.
  • *We used a mix of Washing Soda and Baking Soda as everything I read said that Washing Soda was so acidic and with such a high PH balance that the Baking Soda was needed to re-balance the load as to make sure the fabrics did not cause skin irritation. So we used equal amounts of each in our mix.
  • *I wanted to use a booster in our mix, like the Oxi-Clean, but as I looked for others besides Oxi-Clean I found most were scented.  Purex Crystals were my first choice as a stain booster but since they are scented, I bypassed them for the Oxi-Clean because of the sensitive skins in our house. If it were not for the sensitive skins I may have chosen a scented booster and powdered softener, but the Zote soap does give a good clean scent.

My advice is to customize your recipe for your households needs and then test out different versions to see what is right for your crew, but our version is below. We loved the results and the laundry smells and feel just as soft and good as our normal All Free and Clear detergent.

We average with our costs per ingredient, that the total cost for one batch (which does 256 loads) is between $9.80-$12.90 for the one batch of almost 2 gallons.  The price varies only due to generic or name brand ingredients and if you remove the extra option for the Oxi-Clean or not. This averages out to $0.03-.05 per load!   Our normal liquid detergent (All Free and Clear) is $4.00 at 33 loads which is $0.12 a load. Since I tend to use the liquid more freely and get only 22 loads from the bottle (I always use the large load amount) I would be spending $0.18 per load.
To switch to homemade is a saving on average of 9 - 15 cents a load!
Let me break that down further for you.
Say I do 6 loads of laundry a week for a year.
That’s 312 loads a year.
Homemade would cost me $9.36-$15.60 a year, and store bought would cost me $37.44-$56.16 a year.
A possible savings average of $46.83 a year!
Now I know what you are thinking--that’s not $600 a year! It’s true it isn’t, but remember how I said that mom blogger had six kids? Two of those children were babies in diapers….washable cloth diapers. Also, the $600 was baby wipes and laundry detergent combined. So I can easily see how, over time with a large family, you would save more money with these homemade versions than our smaller family will. Still to me it’s a small save and a fun new DIY to try. So, now for that recipe.

Homemade Laundry Soap

*1 Bar Zote Soap  (or 3 bars Fels-Naptha Soap bars, or use one of each)
*1 3lb 7oz box Washing Soda (We couldn’t find the 4lb boxes-just make sure it’s even with the Baking Soda.)
*1 3lb 7oz box Baking Soda (or 3-4x 1lb boxes if you cannot find the larger box)
*1 box of 20 Mule-Team Borax (You will only use an equal amount to match the sodas so if you’re using 3lbs of each soda use only 3lbs of Borax. If you can find the 4lb boxes of the sodas use the whole 4lb box of Borax. Since we used about 3lbs of each soda we used ¾ of the 4lb box of Borax for ours.)
*½ of a 2lb tub of Oxi-Clean

Dump all of the above in a large container and seal. The bars of soap (Zote/Fels-Naptha) will have to be grated with a cheese grater into small shreds, and then everything should be well stirred. Just like most powders you need to add the detergent mix in the water before the laundry is put in, and if you have an HE washer it’s advised that you dissolve it in a cup of hot water first and then pour it into the washer.

Happy Washing!
post signature


A New Kind of Easter Eggs, Tradition and Mess

Saturday, March 30, 2013

Easter morning as a child in the Hinson house meant getting dressed in our best, most floral and puffy dresses (usually matching ones) and attending church with our entire family. Then home to crowd around the kitchen table and decorate easter eggs, followed by an egg hunt on the lawn, and candy filled easter baskets to sugar us up before we crahsed out for the night.

Now, to clarify, Easter became so much more than this to us as we grew older. The reality of the true meaning of Easter, that Christ died so that we might live, the GREATEST story of Grace....that all came along at an early age as well in our house. We've already started Easter traditions centered around the story of the Cross with Liam so that he too will know it from very early on.
But let's be honest....the part kids really remember from the first to say their 4th or 5th Easter, is the eggs. Eggs filled with candy, eggs filled with money, decorating and dying EGGS!!
And that's okay, their just babies! And I love family traditions! Those times we shared with all of my 7 cousins, crowded around my nana's kitchen table to take turns dropping eggs in dye were priceless.
And oh the messes we made!!
The spilt dye, the smashed and stinky eggs! I want Liam to have the experience of dying eggs but until he is older and can participate in the "mess", I thought up a new way. A more permanent route (because let's face it, noone keeps those stinky eggs!).
My new way--Wooden Eggs.
We found them at Hobby Lobby--go figure--for 40% off of $3.99 for a four pack.
Liam enjoyed painting them just like I recall enjoying dying Easter eggs way back when.  I think every year I'll use them in our Easter decorations around the house. Even though eventually we will switch to dying real eggs, maybe we will just start doing both and add to our decorations each year. With a little modge podge they are sealed for life!
A new Atkinson tradition of our own, along with sharing the story of Grace at 5 a.m. cuddled in bed with mom and dad with a picture book. Oh and the floral dresses, suits and candy filled Easter baskets. ;)

post signature


Organizing Cards

Saturday, January 12, 2013

I'm a pack-rat by nature. So I love finding good organizational ideas, especial those that get rid of a whole drawer or trunk full of junk. Something that always gets shoved into drawers around our house: cards. When Liam was born and on his first birthday, we received so many sweet cards- not to mention those from our baby showers- and I couldn't just throw them away. Until now they were scattered throughout our house, but with two simple rings and a hole punch, they are now nice and neatly kept together on our bookshelf. I even used card stock paper to decorate a cover sheet, and put Liam's name in Braille.

(I think I'll do another for our Christmas cards and one for the cards from our wedding/bridal showers.)


The Nursery to Toddler Room Transformation Part 1

Sunday, November 4, 2012

Slowly but surely, we have been turning Liam's nursery into a toddler's room. It started when we moved into our new house, I knew soon we would need more storage space for toys and less space for things like a changing table and containers of Desitin. So I procrastinated and saved his room for last to be worked on. Now that I'm finally getting around to working on it little by little I think I'll share bits and pieces here and there. 
So piece no. 1 
The owl art has been removed from over his bed (though I painted it and loved the tree branch, I hated my owl) so here's what replaced it....


(Side note: we have kept his owl theme minus the old piece above his bed.)

These frames were so easy and cheap to make! I purchased $5 photo frames at Walmart....

And after removing all the mat, glass and backing, I painted them blue with few streaks of dark brown mixed in to my paint-careful not to mix the colors more than necessary. (Also, dipping a cloth in dark brown paint/stainer and strategically rubbing it along with the wood grain were needed does the trick as well!) 

After I got the effect I wanted with my paints, I attached the wires along the back of the frame. 

Then using mini clothes pins, I hung my pictures and was done!! 


Up next for his room update: 
A toy bin padded bench
Changing table into a night stand 
Pallet made bookshelves 
New bedding

At Home Coffee Bar

We have a serious problem in our new house... It's called a lack of kitchen counter space. It's very serious too as my hubby is a major chef and spends lots of time in the kitchen. He's one of those "use every pot and pan on one meal" kind of cookers too.
So what to do when you have less counter space than your used to?
Well keeping lots of appliances on them is totally a bad idea as we have found. These appliances usually end up sitting out of the way in the laundry room or dinning table were we eventually have to move them right back after clean up, and clean up never happens the same night.
Part of our kitchen appliance clutter=our two coffee pots (not his and hers, more like coffee pot and cappuccino/expresso machine). Yes we are major coffee snobs and we are totally okay with that.
So to get these off our counter top and provide the master chef with a little more room, we made a coffee bar out of our old china cabinet. All it took was a $6 board from Lowes, a $0.99 bottle of white paint which we already had, two $5 bracers, $1.99 hooks and a handy dandy husband to install it all. Five minutes later ta-da!!
Clean counters = cute coffee nook.
Cute coffee nook = clean counters.
It's what we call a win-win.


Rewind Time for a Pumpkin

Wednesday, October 31, 2012

So you got excited that it was officially fall, and you carved your pumpkin a little too early huh???
Well join the club--because I totally did--but now it's withering before we get to Halloween night (when everyone sets out their pumpkins and lights them up) so what now? Carve a new one? Have none?
Nope! You're going to save that pumpkin!! How?
Why soak it in a sink full of water of course! I know what your thinking because I was too when my sister-in-law suggested this...

"Won't it get soggy and fall apart?"

Nope here's proof in my photos.
Just run a sink full of water (room temperature) and soak it for a few hours (or if your like me overnight) and ta-da!! The pumpkin "re-hydrates" itself, and is ready to go!


(Sorry, no photo of the withered pumpkin, but the after photo is 6 days after the before shot!)

Happy Halloween all!!

Erasable Love Notes

Friday, July 20, 2012

When Brian and I attended the NOAH Conference for Liam’s Albinism, we sat in on a session called “Team Parenting”. It was geared towards making sure both parents of a special needs child did not feel neglected by their spouse or like they were taking on the majority of the “work load” in the household. Part of the conversation was on making sure that your spouse and you kept in contact daily—in phone conversations, text messages, leaving small notes, etc. Several of the parents gave some examples of things they do daily just to let the other person know that they care like leaving love notes for them throughout the home/work, doing mid-week lunch dates, morning coffee together, or evening walks around the block. (For me, I had heard all of this once before in our pre-marital counseling that we did through our church years ago but Brian said for him, reinforcing it by hearing it again was a good reminder.)

 One of the dads mentioned that his wife stole an idea off of Pinterest and that he and she both use it to leave each other little messages each week. I too had seen this done on Pinterest, I’d even “repined” it 6 months before, but—since my hubby is NOT on Pinterest—Brian had never heard of this. (Laugh all you want but he thought it was cute.) So crafty me, when I got home one evening and had some free time, I put our own together and placed it on our nightstand for him to see. He laughed initially but I bet he uses it eventually. (Fingers crossed at least!)

*If it does not work for our little love notes at least it will work in my kitchen for a to-do list and a weekly menu!
Bonus: It costs under $10 to make (depending on size frame)!!
Picture frame
Choice scrapbook paper
Dry erase markers

Multiple prints and multiple uses: To-Do lists, Menus, Love Notes....

Wooden Photos

Tuesday, June 19, 2012

These were made by one of my best friends, Jess, who doesn't like to brag but our family thinks she is pretty awesome and did I mention talented? This comes from someone who had me walk her through creating her first painting to hang in her own house and now she is making these for others. I won't tell you how she does it, but I will tell you it takes a lot of work and a little luck to craft these blocks. If you want to know more or how you can contact Jess just shoot me a message, she would be happy to make anyone one of these to hang in their home!

Kitchen Transformation

Tuesday, May 8, 2012

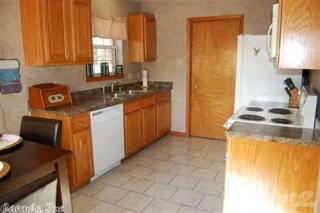
 When we moved into our new house we HATED the color of our kitchen cabinets.  Before we would commit to the house completely we went looking for a way to transform the cabinets instead of replacing them and low and behold we found the answer….
Rust-oleum Cabinet Transformations Kit.

Here are some before and after shots of our new kitchen, despite how dark our kitchen looks in these photos (due to the broken kitchen light and a crappy iPhone camera) our kitchen actually looks 10 times better than before! The process is pretty self explanatory on the box and there is even a YouTube video out there to go with it so I won’t go into step-by-step detail here; but I will advise what they didn’t and that is make sure you stop at the paint counter at your local hardwood store and have them TINT THE STAINER WITH YOUR COLOR CHOICE or you will have white cabinets!  (Just incase you miss the fine print on the top.)
Here are some of our before and after photos of our new kitchen.


The color choices for the Light Kit. *Note that
small print on the top telling you to color it at the
hardware counter? Small huh?

The color choices for the Dark Kit
MEMO TO MOM: Do always read the instructions.